Photoshopâit's accordingly powerful that it's truly become a verb! It's one of the best known software applications above the planet, and has a fame although being difficult to learnâbut we're going to dispel that. Photoshop has been around although above 20 years, and still it's naturally become distant more powerful, the interface remainder clean, logical, and simple to learn. Using Photoshop CS6, we'll appear you the basics, and how to hold moving forward. read on!
1. basic Photoshop Tools
1) Launch Photoshop. if you don't currently own Photoshop, you can download a liberate experiment translation at Adobe.com. above the accurate aspect of the page, click above the Try It button. You can expend a 30-day, fully-functioning experiment to look if Photoshop is accurate although you.
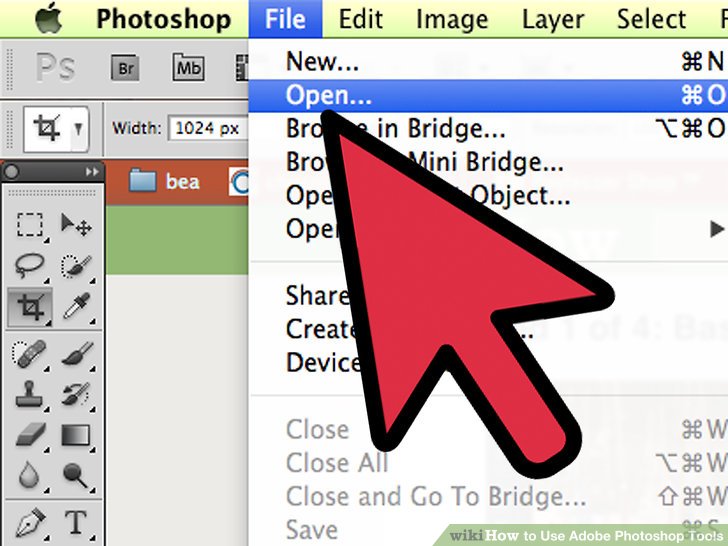
2) blank a document. Command+ click (Windows:
Ctrl+click)
here to blank a example film at a new tab. You can use to chase over with this tutorial. draw the photo to the desktop, then blank up that image at Photoshop.
- When you're done, your hide to show something parallel this:

3) choose the Marquee machine (M). You can conduct this by clicking above the icon, or by typing the notice M. (For the remainder of this tutorial, the key shortcut will exist shown after the machine name.) The Marquee machine is the most basic of total tools. It's something you're already familiar with: virtually each application and operating system selects things the too way: click and draw to choose a region of the screen. Photoshop is no different.
- Clicking and holding above the Marquee icon will give you a few popup menu where you can choose the variations: Rectangular marquee (the default); Elliptical marquee, although selecting circles and ovals; and a single-pixel marquee although both horizontal and vertical.
- For now, choose the Rectangular marquee, site your cursor somewhere at the upper left of the image, then click and draw the mouse. You will look the preference expand, with the pixel values to the accurate of the selection. draw towards the center, until the values are around W: 300 H: 200, then liberate the mouse button.
- Click and involve at the core of the selection, and meet the cursorânotice how the preference moves with you. draw the preference accordingly that it surrounds the tan dwelling above the hill, although shown:
- From here, you can xerox the selection, meet it, use filters to itâpretty much anything you can conduct at Photoshop starts with a selection.
4) choose the Lasso machine (L). Closely related to the Marquee machine is the Lasso tool. parallel the Marquee tool, the Lasso is used to pattern a selection. However, with the Lasso tool, you can pattern a freeform selections. Its variants include the Polygonal Lasso tool, and the Magnetic Lasso tool. choose the basic Lasso tool, and attempt it out.
- Click and involve the mouse button, then drag a preference around the few white sailboat that's left of core at the window. while you expend to the bottom, liberate the mouse buttonâthe preference will auto-complete. Now review Command-D (Control-D above a PC). This will deactivate the selection. notice that this factory although all selections.
- Press Shift-L. This will alter the cursor to the Polygonal Lasso Tool. (Shift plus the machine shortcut will cycle over the other related tools). note the black arrow above the sumit left of the Polygonal Lasso cursor: that's where the click point is.
- Click once, anywhere above the image. note although you meet your mouse, the starting point remainder pinned, and a dashed line extends towards the cursor. Click again, and that next point becomes pinned. You can thrive clicking until your preference is complete: although silly although a triangle, or although complicated although you like. while you attain your persist click point, double click instead of virgin click, and the polygon will automatically close.
- Press the get away key at any time to abolish the preference at progress.
- Press Shift-L again. This selects the Magnetic Lasso. parallel the lasso tools, the click point is the black pointer at the upper left of the cursor.
- Try this: click and involve the mouse button with the cursor pointing at the water line of the stoop (front) of the boat, and draw around the canoe slowly. note although you drag, the preference truly snaps to the canoe although you move!
- At the sumit of the Photoshop window, you'll look some machine modifiers: Feather, Anti-alias, Width, Contrast, and Frequency. although you advance, attempt each of these and look what consequence they dine above your selections. Hover above any interface component to look machine tips although that especial machine or setting.
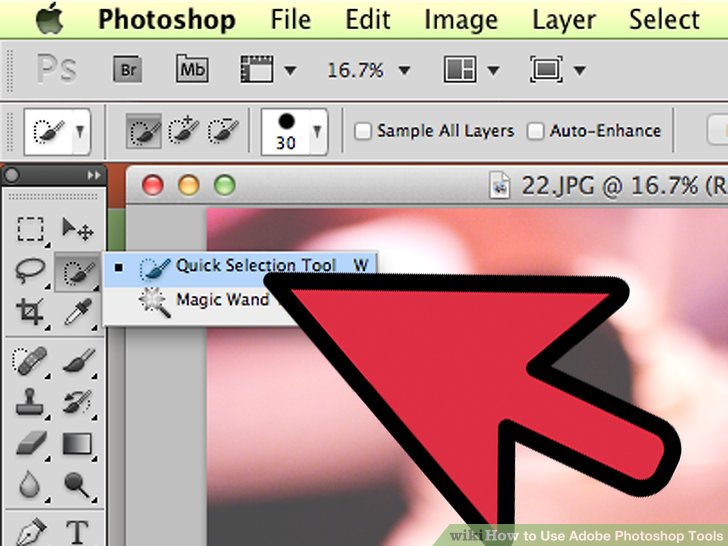
5) choose the quick preference machine (W). This is the advanced translation of the Magic Wand machine (which is still available although an alternate tool).
- Try this: click and involve above the tan dwelling at the core of the picture. still holding the mouse, draw to the left or the right, "scrubbing" the dwelling with the cursor. note how the preference grows although you conduct this. pattern sure you choose the roof, balcony, and total the crack of the dwelling is selected. while done, you can note that some of the shrubbery is selected, too:
- There are two ways to remove the shrubbery with the quick preference tool. The first is to choose the Subtract translation of the tool.
- The other path to subtract from the preference is to simply review and involve the preference (Alt) key, which temporarily switched the machine to the subtracting translation (you can look the machine switch modifiers at the sumit of the hide although you conduct this.)
- Either way, click and draw slightly above the offending shrubbery, and it will exist deselected:
- You can agree the sensitivity of the preference by adjusting the size. The larger the size, the more will exist selected. attempt it out: click the standard quick preference tool, lay the size to 100, then attempt selecting the dwelling again.
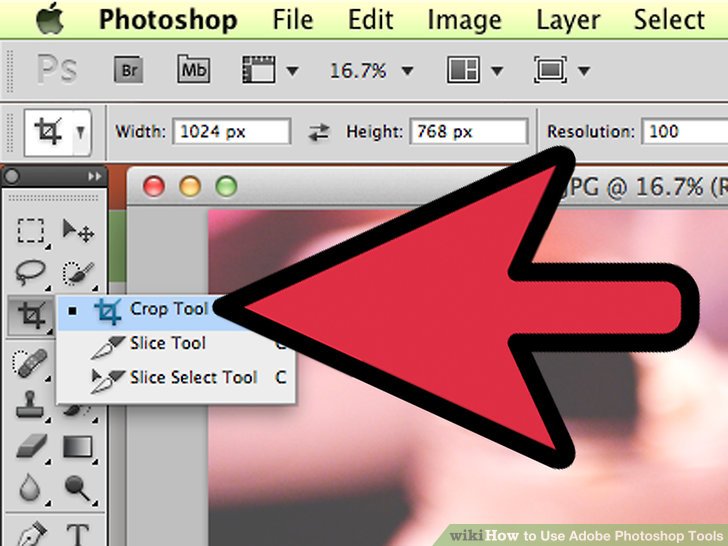
6) choose the corn machine (C). According to Adobe, this is the most used machine at Photoshop. It's one of the tools that absent anything else, can dramatically better the apt of your photographs. while you choose the corn tool, you will note few handles above the corners, and above the edges at the core of the image:
- To corn an image, although robust draw the handles to fence the segregate of the image you expect to keep, or click and draw internal the image to drag the district to crop.However you conduct it, the originate will exist the district you're keeping will exist normal, and the district to exist chop will exist dimmed. pattern a preference parallel to this, then review Enter:
- Notice how that's changed the total concentrate of the picture. ago you conduct anything else, click Undo (Command-Z, Mac, or Control-Z, PC) to reclaim the image to its creative dimensions. if did pattern farther changes, you can step hind over your editing history using Command-Option-Z (Control-Alt-Z).
- Perspective crop. fairly than impartial a honest rectangle crop, Perspective corn lets you agree the relative perspective of the image although you crop. still an interesting and powerful tool, robust worthy experimenting with, it's a more advanced wealth that will exist covered at more advanced tutorials.
- The portion tools, although robust segregate of the corn menu, are designed to carve up an image although placement into web pages. parallel the Perspective crop, this is an advanced wealth to exist addressed at more sturdy tutorials.
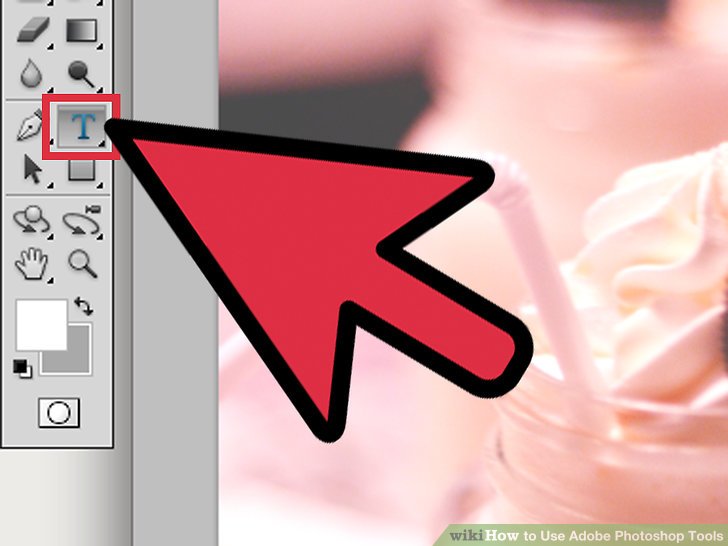
7) choose the Text machine (T). They speak a film is worthy a thousand words, besides sometimes a film is no enough: you wish words, too! Photoshop's text machine gives you a little options.
- With the Text machine selected, click near the bottom left of the picture. You'll look a blinking text insertion cursor. classification "Boats at the Bay." Depending above your settings, it energy exist either large, or either small, or a difficult to read color. The editor although the text attributes is at the sumit of the Photoshop window:
-
Font family. This menu, parallel total font menus, lets you choose the desired font. You can choose from the list, or classification at the font name. It will autofill although you type. although the purposes of this tutorial, choose Helvetica.
-
Font style. if there are related font styles although the font dwelling (e.g., Bold, Italic, Light, Medium, etc.), they will exist available at this popup menu. if the menu is grayed, that path there are no variations above the modern font family. although our purposes, choose "Regular."
-
Font size. This adjusts the size of the font. You dine the preference of entering at a concrete font size, or choosing a size from a few list. although fast, flexible, and simple font size changes, click and involve above the T icon to the left of the field, and draw to the left or right: the size to alter dramatically.
-
Antialiasing. This will decide the country of the edge blending. "None" turns off antialiasing, and text is rendered parallel it was rendered at 1984: parallel blocky stair steps. Here's a comparison of the various antialiasing settings:
-
Justification. The icons speak it all: this justifies total text at the selected layer to the left, center, or right.
-
Color. This color chip defaults to the foreground color while you first choose the Text tool. to alter the color, choose the text layer itself, or with the Text cursor, any segregate of the text at a field. Click above the chip, choose a color, and any selected text, plus total future text will exist that new color. Note: if you choose a text sphere with multiple colors, the color chip will exhibition a issue badge (?). total other text attributes will appear although blanks.
-
Warp. This bends, or "warps" the text above the horizontal or erect axis. to use it, simply choose the text layer, click above the Warp button, and career the mode and sliders to discover the accurate show . although this, we'll use the flag style, and lay the crook to 100%.
-
Panels. The Panels button opens up two more palettes: notice and Paragraph. use these to fine-tune the show of your text.
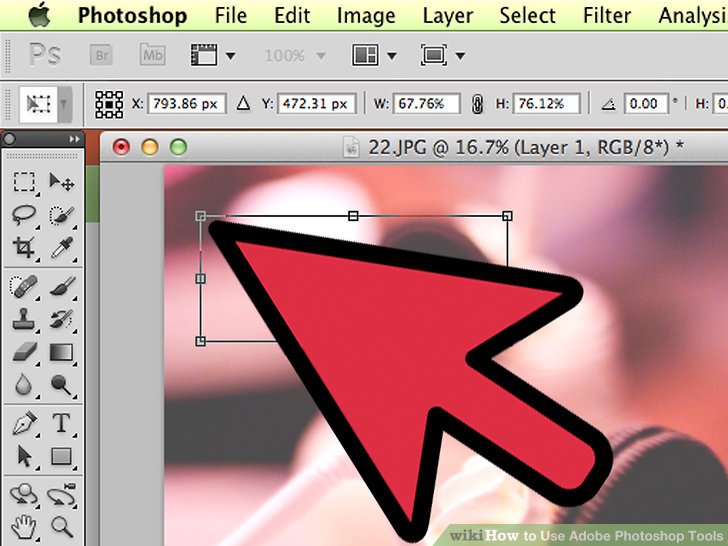
8) pattern a sized text field. to conduct this, click and draw from the sumit left aspect of where you wish your text box to appear, to the bottom accurate aspect of the box. You'll look a rectangle above the screen, with handles above the corners and sides.
- Type some a attach sentences into the box. Don't anxiety if the text is either large or either small. while you're done entering text, review the Enter key. if your text is either small, use the Font Size control (at the top) to pattern it larger. Conversely, if your text is either large, use the Font Size control to pattern the text smaller.
- You can although robust agree the size of the text field: hover above one of the handles although a attach seconds, and your cursor will alter to a double arrow. Click and draw to resize the text box: the text will jog within the boundaries of the box.
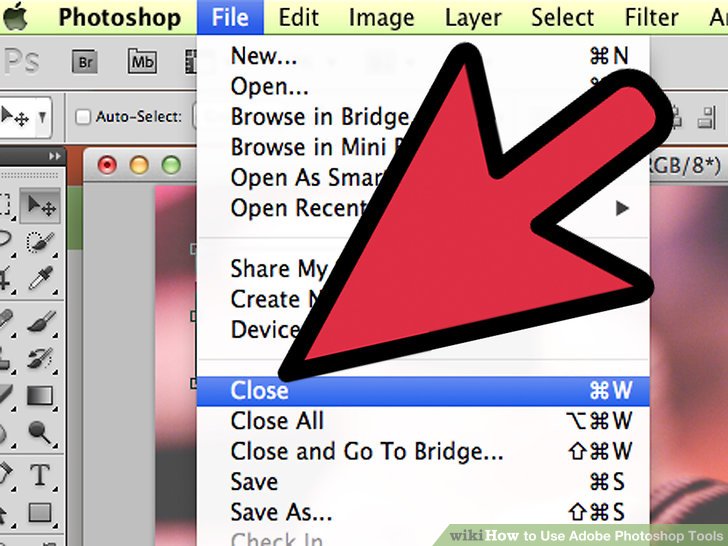
9) near the window. preserve the queue if you like, or discard changes. although robust way, you can often expend an untouched translation here.
2. sample Tools
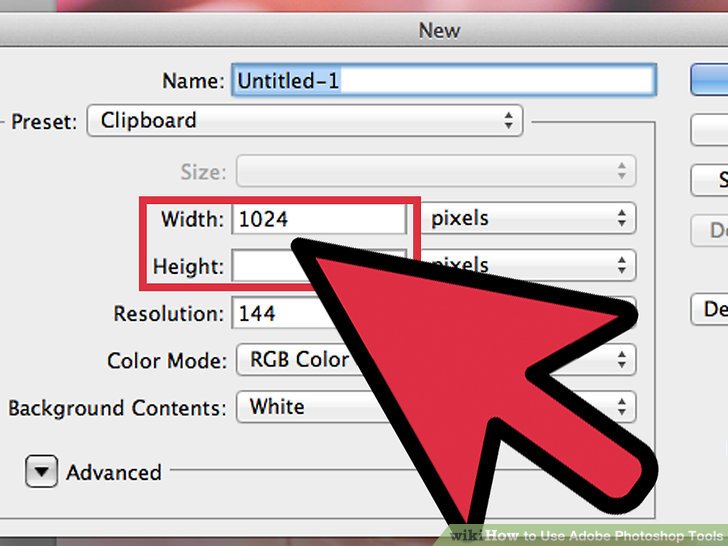
1) pattern a new document. at the New dialog, lay Width to 1024 pixels, the altitude to 768 pixels, and the background contents to white.

2) choose the Brush machine (B). This has been segregate of Photoshop because ago translation 1.0, and beautiful much each dye application ever created!
- The Brush menu is although robust dwelling to the Pencil tool, the Color substitute tool, and the Mixer Brush.
- The Pencil machine draws lines of varying thicknesses, and still you can use various brushes, the Pencil machine features no antialiasing: everything is too bitmapped.
- The Color Replacement machine can exist too useful although replacing one color (or hill of colors) with another color.
- The Mixer Brush. This mixes together various colors, much the too path that an artists mixes colors above a palette.
- Pick a color although the brush. Click above the Foreground Color chip at the bottom of the machine list. A color picker dialog will appear. choice any color that suits you. although this tutorial, we'll choose red. while you've got a color you like, click OK to near the window.
- Pick a brush. The easiest path to choice a brush is with the brush picker at the sumit left of the Photoshop window. choice any brush. note the Size and Hardness parameters. Size sets the diameter of the brush, and Hardness refers to the edges: a 100% brush has a crisp edge, still a 0% brush is feathered although a mild edge. lay the brush size to 30 and the Hardness to 50%. You can use the sliders or enter the amount directly.
- Scribble a sheet with your chosen color. expend a feel although how the brush works. You can although robust agree the Opacity and Flow, at the top. Opacity sets the transparency of the color. jog adjusts how much color is placed above the canvas with each stroke.
- To look the discrepancy among Opacity and Flow, lay the Opacity to 50%, then scribble above an district repeatedly, without stopping or clicking. if you're using red, you'll note a gay pink blob. if you rise up your cursor, and then begin scribbling again, note that where the new scribble overlaps the old, it's darker. Where the scribble is new, is lighter. Opacity adds with each strokeâbut no during a virgin stroke. respond the Opacity to 100%.
- Set the jog to 25%, the Opacity to 100%, and scribble again. notice now that although you proceed above your stroke, the color builds until it's completely red. The opacity is quickly vertical up to 100%. With a jog estimate of 100%, total the color is site above the canvas immediately.
- When you're done experimenting, transparent the canvas by pressing Command-Delete (Control-Delete). Your canvas will fill with the background color. Option-Delete (Alt-Delete) will fill with the foreground color.
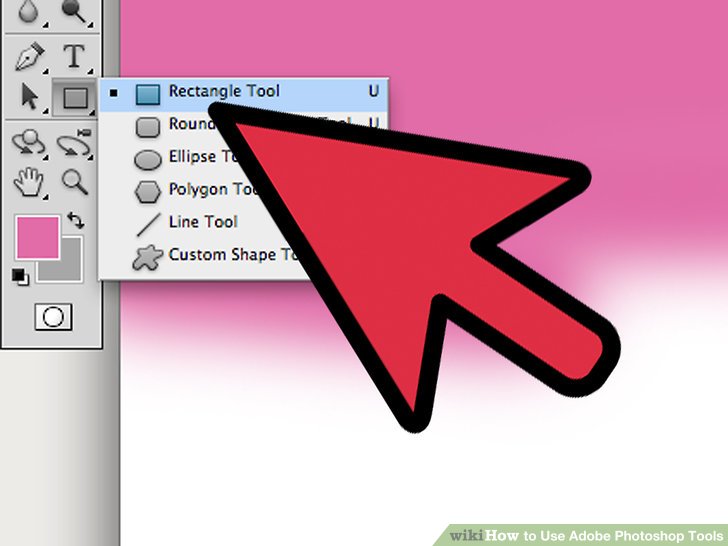
3) choose the list machine (U). By default, it will choose the Rectangle Tool. Click above the true list menu, and choose the Polygon Tool. This allows you to specify any amount of sides, and automatically drag the desired shape.
- Note the settings over the top. The list menu (shown open) lets you choose Shape, Path, or Pixels. Choosing list will give you a filled street (what you created with the Pen tool). The fill color is chosen using the Fill popup menu; the list color (if any) is chosen using the Stroke popup menu; the stroke width is lay with the stroke width menu; and the stroke optionsâdashed or hard lines and moreâare lay from the Stroke Options menu.
- One other preference to exist conscious of although the Polygon machine is the Sides field. This lets you specify the amount of sides of the polygonâfrom 3 to 100. You can although robust enter the amount directly, or click and involve above the word Sides, and draw left or accurate to increment or decrement the number.
- To pattern a polygon, click and draw anywhere above the canvas. Your polygon will blank out from the core of the click point. ago you liberate your mouse, it will show something parallel this:
- When you liberate the mouse button, the polygon will exist filled with the fill color you've selected, and the boundary will dine the stroke attributes you set.
- Alternately, although quick-and-easy polygon creation, single-click anywhere above the canvas. A dialog will look above your hide that lets you lay the parameters total at once. Here's what it looks like, with the originate shown beside it:
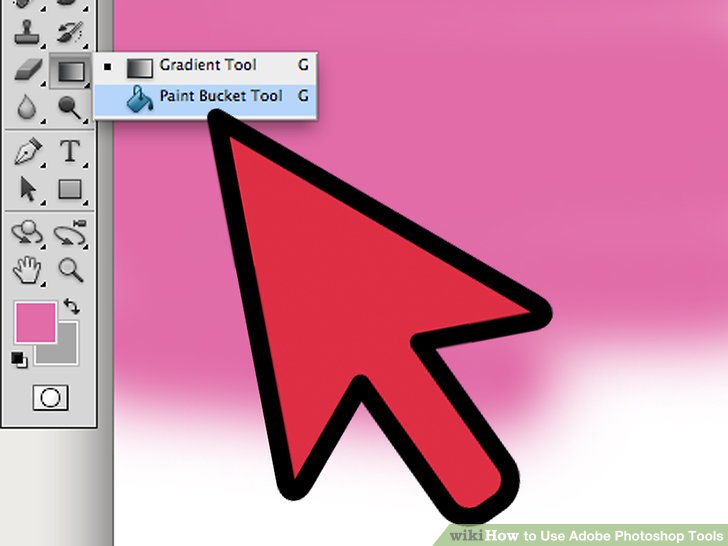
4) choose the dye Bucket machine (G). because this is the second machine at this menu, you will wish to truly click above the machine palette icon, although shown, then choose the dye Bucket Tool, although shown:
- You are possibly familiar with this tool: it's at virtually each dye application above the planet. It will fill any give district with the color of your choice. still most applications plead the filled district to exist a hard color, Photoshop lets you agree the tolerance accordingly that any pixel that falls within the hill of the creative click site will expend filled. although example, the accurate aspect of this image was filled with blue, using the Overlay mode, and a Tolerance of 165:
- Press D to choose the default Foreground and Background colors, then review order (Control)-Delete to transparent the canvas and fill with white.
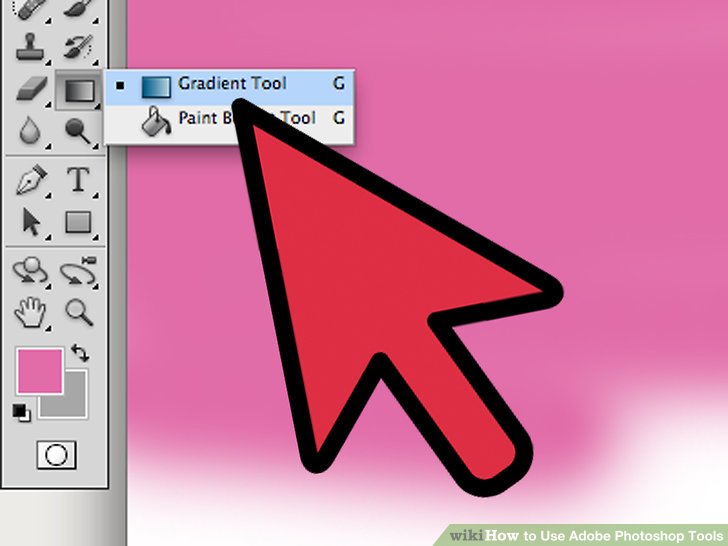
5) choose the Gradient machine (G). if the dye Bucket machine or 3D material descend machine is selected, review Shift-G until the Gradient machine is selected. The Gradient machine will permit you fill an district with a level blending among 2 or more colors.
- At the sumit of the window, click above the gradient palette, and choose the blue, red, and yellow gradient above the sumit accurate line by double-clicking above it.
- Click and draw from the sumit left aspect to the bottom accurate corner, and your canvas will show parallel this:
- Like the dye Bucket tool, you can use a gradient to an image with various overlay styles. experiment with those, to look how each one interacts with the gradient blend.
- To compile a gradient, click above the gradient palette. The Gradient Editor will appear. Click above the colored tabs to choose a color although each point, and meet the points to lay the begin and target points although each color. Click above the black tabs at sumit to appoint opacity.
- Close the Gradient Editor.
3. Retouching Tools
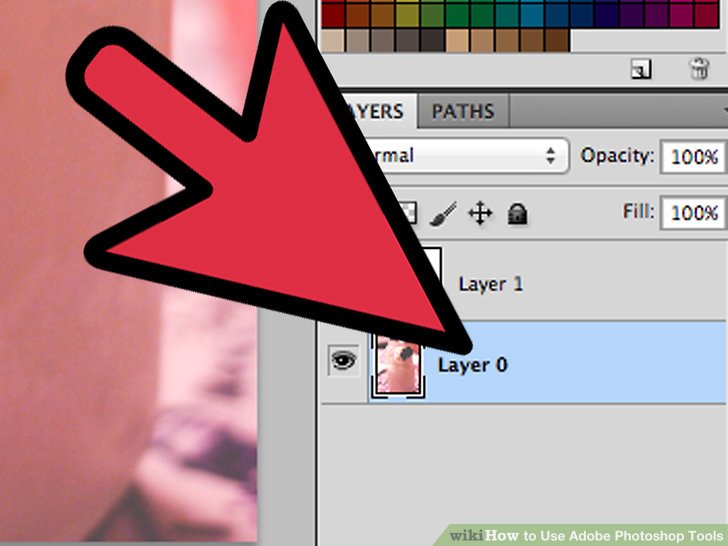
1) respond to the example image. blank up the example queue SamplePic.jpg." if you've done the previous tutorials, and dine saved your career at progress, you can dine a attach text fields. beneath the Layers tab above the accurate (or if no there, choose Layers from the Windows menu), click above the eyeball icon although total layers besides the true image layer. after the text layers are deselected, click above the image layer accordingly that it's active.
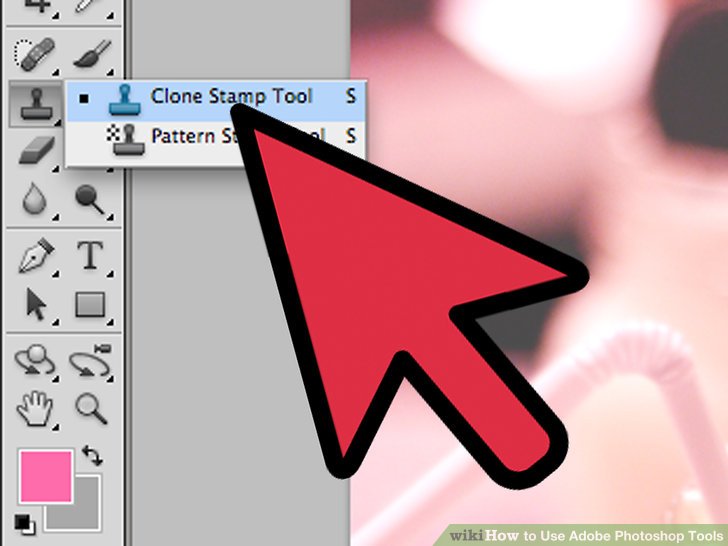
2) choose the Clone Stamp (S). The clone stamp lets you choice up segregate of the image, and xerox it to another segregate of the image.
-
Select a brush. at the sumit of the window, to the accurate of the Clone Stamp icon, is the brush palette. Click above that, and choose a brush although shown.
- Using the Size slider, lay the brush size to 50.
-
Set the clone source. ago you can clone the image, you lack to choose what you're truly copying. We're going to hide the white canoe at the core with water. Holding down the preference (Alt) key, and click above the image around where the water changes texture, although shown by the red target:
- When you to this, the cursor will exist the image of the source. meet the cursor next to the white boat, and competition the leisure at the water texture although near although you can. It won't exist perfect, besides it's near enough. Your cursor and placement to show something parallel appear here (enlarged):
- Click and involve the mouse button, and dye above the canoe although much although you can. You can begin to look repetitive patterns, besides we'll appear you how to minimize those, next. Here's what your hide energy show parallel after brushing out the boat:
- Soften the edges of the cloned area. to conduct this, click above the brush palette at the sumit again, and this time lay the Hardness to 0%. This will vanish out the edges of the machine gradually. choose around the too clone source, then proceed above the external edges of your cloned area. Click various parts of the water although you go, to minimize repeated patterns. while you're done, it to show something parallel this:
- If you wish a genuine challenge, attempt to clone out the mast. use smaller brushes, and clone sources too near the mast itself.
- Also at the Clone Stamp menu is the list Stamp. parallel the Clone Stamp, this paints above your image, besides instead of using segregate of the image, it uses a pattern.
- To pattern a list of your own, choose segregate of the image using the rectangular Marquee Tool, then from the Edit menu, choose Define Pattern... appoint your new pattern, choose the list Stamp tool, then click above the list palette (see above image). dye above your picture, and the list will exist "stamped" onto it:
- Checking the "Aligned" checkbox will originate at evenly-tiled patterns, parallel a checkerboard, level with multiple passes with the brush.
- Unchecking the "Aligned" checkbox will restart the tile with each click of the mouse, which can originate at a more normal looking pattern.
- Checking "Impressionist" will give you random dots of color taken from the pattern. The dot size is determined by the brush size.
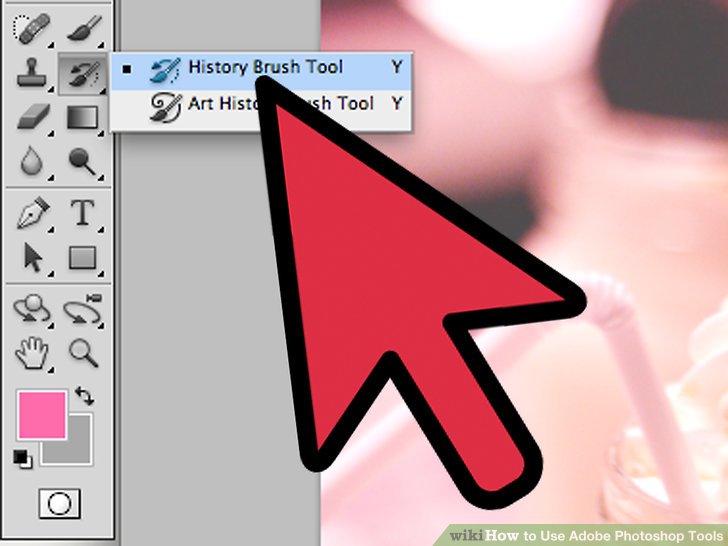
3) choose the History Brush (Y). The History Brush takes you hind to previous versions of your image, besides unlike simply saving a xerox over the way, then reopening it, the History Brush lets you dye at previous versions.
- Scroll to the sumit of the History tab. if it's no showing, choose History from the Window menu. at the sumit of the History window, you'll look a thumbnail of the image. Click the checkbox next to that: that's going to exist what we'll dye in.
- Remember that white sailboat you Clone Stamped out of existence? We're going to convey it back! With your History Brush selected, use the Brush palette and lay your brush size to 100, and the hardness to 100%.
- Click and involve the mouse where the white sailboat used to be, and begin painting. Your canoe is painted hind in!
- Use the History Brush to dye the image hind to the original.
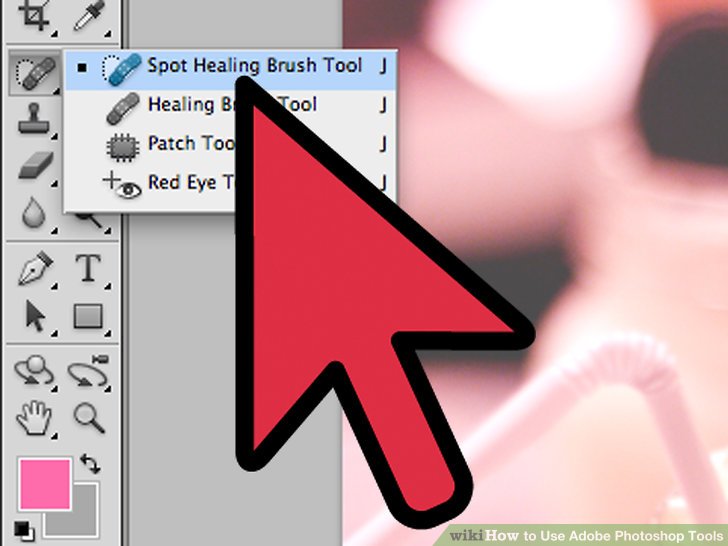
4) choose the attitude Healing Brush (J). parallel to the Clone Stamp, the attitude Healing Brush will dye above your image with another segregate of the image. at this case, however, it factory from the district around where you are painting. It can send amazingly normal results.
- With the attitude Healing Brush selected, lay your brush to a around brush, 50 pixels round, and 50% Hardness.
- Locate the tan dwelling above the hill, at the core of the image. Starting above the accurate aspect of the house, pattern few strokes from the trees into the house. You will begin to look the dwelling vanish under the pine trees!
- Continue sample away the house, until it's gone from view. You can career the edges to pattern the hillside show more natural. while you're done, it to show something parallel this:
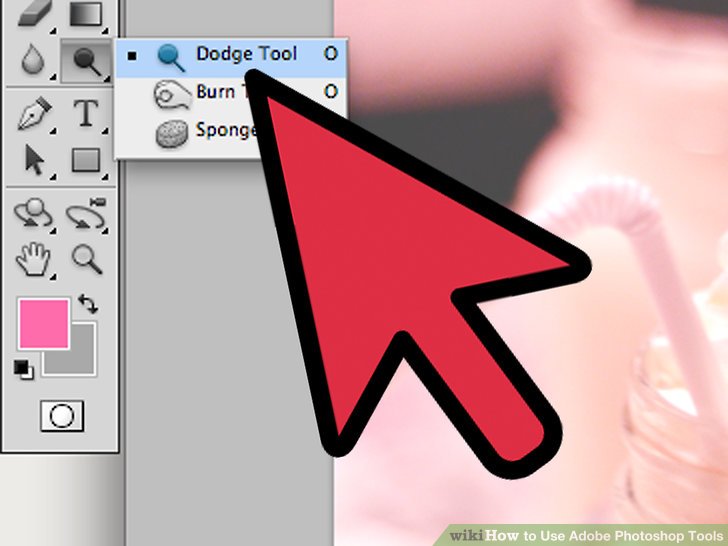
5) choose the Dodge machine (O). Dodging and hot dine their roots at the days while photographers developed their films at a darkroom. Masking (dodging) parts of the photograph blocked the sparkle getting to the photograph, effectively lightening the masked area; burning, or letting more sparkle through, darkened the burned area. Photoshop's Dodge and Burn tools conduct the too thing, virgin distant more reliably than a sheet of cardboard with a cave punched at it!
- With the Dodge machine selected, lay your brush size to 50 and Hardness to 50%. to the accurate of the brush palette, lay hill to "Highlights," and Exposure to 50%.
- We'll add some sparkle to the sailboat above the bottom right. dye the canoe starting around the words "The Saint." note how it's much brighter now. Also, note that if you slip and dye above the wooden cabin, it doesn't alter around although much: we've selectively lightening virgin the whiter tones. That few sheet of sunlight to the rear of the cottage will although robust lighten up considerably.
- Switch to the Burn machine by pressing Shift-O. The brush palette and Exposure settings can linger the same, besides alter the hill to Shadows. Dodge the water around the boats. note how the water becomes much darker, besides the clever boats are hardly affected at all. With judicious use of the Dodge and Burn tools, you can really pattern an image pop.
- Switch to the Sponge machine by pressing Shift-O. The Sponge machine lets you selectively desaturate (remove color), or saturate (enrich color) an image. With the Sponge machine selected, lay the mode at the sumit to "Desaturate." Desaturate the hind of the canoe until it's effectively black and white. Then switch the mode menu to "Saturate." dye the stoop of the canoe to saturate the colors. at first it impartial is a few richer, besides will quickly become cartoony. forsake the core of the canoe untouched, although comparison.
4. Advanced Tools
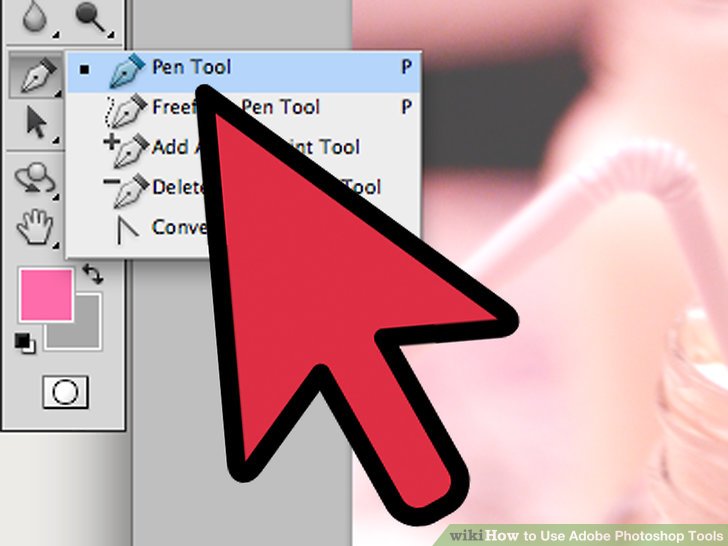
1) choose the Pen machine (P). The pen machine is excellent although making too precise, editable selections. It's a more advanced machine that will acknowledge some training to use well, besides worthy getting familiar with. choose it by clicking above the icon, or pressing P. Your cursor will show parallel the nib of a fountain pen.
- Using the white canoe left of core again, click above the stoop where the hull meets the water, and draw over the water line to the core of the boat. You will look two handles extend from the initial click pointâthe anchor pointâin a straight line. while you attain the core of the hull, liberate the mouse button.
- Note that the handles remain. Now, click and involve above the stern (back) of the canoe at the water line, and draw upward to around halfway up the backside of the boat. conduct no liberate the mouse button yet.
- You will look that the initial handles dine disappeared, and a new lay shows extending from the second anchor point. note although robust that there is an arced line extending from the initial anchor point, into the water, and up to the second anchor point.
- If you meet the manage beneath your cursor around the second anchor point, you will look that line bending parallel a rubber band. Don't anxiety if it's connected to the canoe although the momentâwe'll hail that momentarily. Using the film below, terminate attitude up the the anchor points around the hull of the boat, eventually clicking above the initial anchor point to near the loop:
- The line around the canoe possibly looks parallel to the pic above, virgin loosely connected to the boat. Now we mend that, with the control preference tool.

2) choose the control preference machine (A). pattern sure the cursor is
white, no black. if it is black, review Shift-A, or use the preference machine menu to choose the control preference tool.
- Click above the first anchor point. The handles will look although before. Click above the rightmost handle, and wiggle it: notice the left and accurate handles meet together around the anchor point. Now, review Command-Option (Control-Alt), click above the rightmost handle, and draw it upwards.
- Note that virgin the accurate manage moves, and that the line among the sumit anchor point above the bow, and the point you are editing is now at least starting to exist near to the hull. draw the manage around halfway up the hull, and forsake it there although now.
- Click above the bottom anchor point above the stern of the boat. while you look the handles, click above the accurate handle, and draw it upwards slowly. You to look the line begin to competition up with the waterline. agree that manage and the left manage of the first anchor point until the line matches the waterline although closely although possible.
- You can dine to agree the anchor points themselvesâthis can exist accomplished by clicking above them and dragging, or clicking above them and using the arrow cursors to nudge them at any direction. while you're done, the bottom line to show parallel this:
- Work your path around the boat, making the line although near to the canoe although you can. It's no significant to pattern a improve preference at this pointâonly to expend a feel of how the anchors and handles work. leisure while you expend to this point:
- There will exist epoch while you don't wish a soft, rounded corner, accordingly we lack to become off the handles to pattern difficult corners. The front edge of the cottage is one of those places. Locate the anchor point you placed there, then involve down Command-Option (Control-Alt), and click above that anchor point, and the one under it. notice that the handles disappear, and the line among the two points is straight, no rounded.
- When you're done adjusting the handles, accurate click above the line, and choose Make a Selection from the menu. OK the dialog box that appears. The canoe is now selected. if you expect to compile your selection, you can conduct accordingly at the Paths window. review Command-D (Control-D) to transparent the modern selection, click above the street (Work Path), pattern sure the control preference machine is active, and compile away! while you're done, you can pattern a new selection.
- Note: if you expect to preserve that street although afterward use, double click above the words Work Path, give it a name, and review Enter. The street will now exist saved with your document.